Use the server manager to manage the data source server and set server security.
General
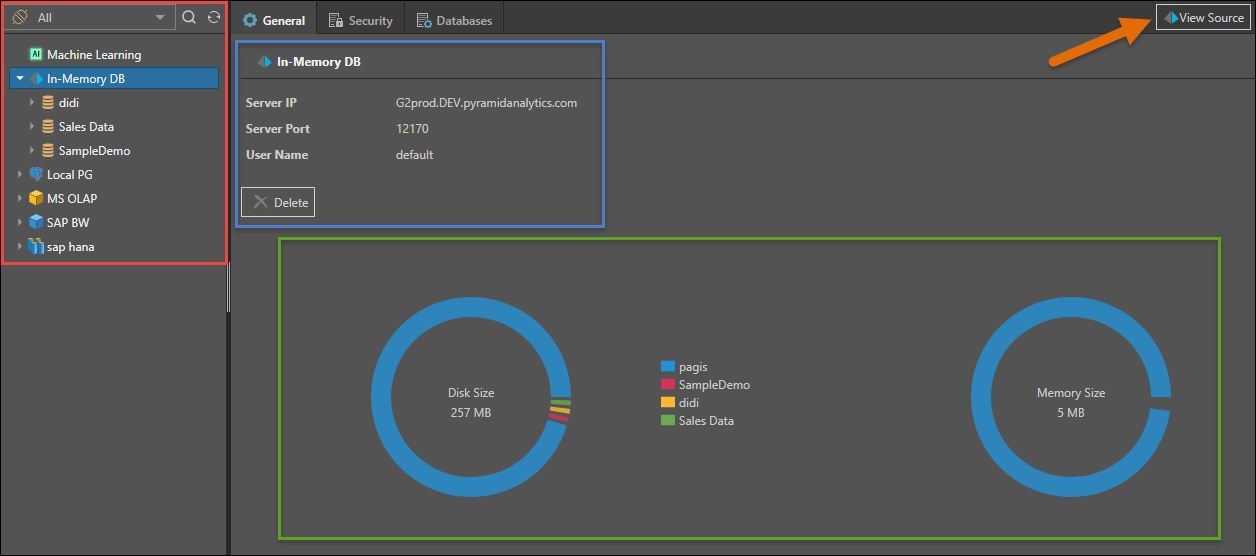
Use the server tree on the left (red highlight below) to find and select the data source server you wish to manage. You can use the drop down to filter the data source type and quick search to find items by name.
Once selected the general tab will show:
- Server IP: the address of the data source server
- Port: its port (if relevant)
- User Name: the username to connect to the data source (if relevant)
From any of the server tabs (General, Security, and Databases), you can click the View Source button (orange arrow) to see and edit the server in the sources page.
Note: For Pyramid In-memory data source servers, two extra charts are displayed showing disk size and memory size (green highlight).
Security
For a given data source server, select the Security tab to manage access to this server by role.
- Select the roles that should be assigned to the server.
- Read: users will be able to query the server (subject to database and model specific access)
- Write: user will be able to build new databases on this server using the data modeling tools
- You can assign the same role permissions for all of the subordinate databases and models within the server by clicking Propagate Roles button.
- Use the role-specific propagate button to propagate a single role at a time.
Click Apply to save your selections.

Databases
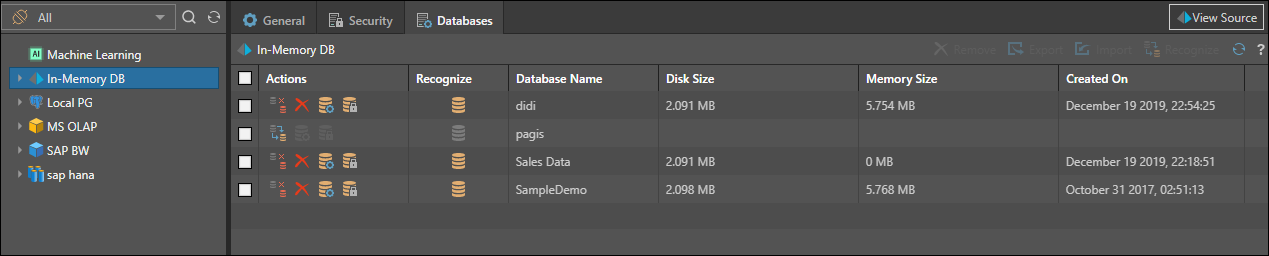
Click the Databases tab to see the list of databases hosted on the selected server .
For each database you’ll see the following columns:
- Actions: this is a list of database specific actions. The choices will vary by data source type.
- De-recognize: click to de-recognize a materialized database in the Pyramid repository. This will make the database INVISIBLE to users in Pyramid without deleting the actual database.
- Recognize: click to recognize a materialized database in the Pyramid repository. This will make the database VISIBLE to users in Pyramid, even if it was created outside of Pyramid.
- Delete: click to delete the database. This feature is only available on some systems.
- Edit: go to the General tab for the given database. This is a shortcut button.
- Security: go to the Security tab for the given database. This is a shortcut button.
- Recognize: indicates if the database is currently recognized in Pyramid. If not, you can select the database and click recognize it. You can also select a materialized database and click Remove to de-materialize it.
- Database Name: displays the database name.
- Disk Size: the database's disk size.
- Memory Size: the database's memory size (if relevant)
- Created On: the date and time that the database was created.
Macro Actions
Users can use the checkboxes in the list to perform bulk actions. Not all actions are available on every database type.
- Remove: when a recognized database is selected, the Remove button is enabled, allowing you to de-recognize that database.
- Recognize: when an unrecognized database is selected, the Recognize button is enabled, allowing you to recognize the database in the Pyramid repository.
- Refresh: refresh the list of databases.